Mastering Gmail Labels: How to Organize Your Inbox Like a Pro
Mar 17, 2025
Mastering Gmail Labels: How to Organize Your Inbox Like a Pro
Introduction:
Inbox overwhelm is a common struggle for busy professionals. The average person receives around 120 emails a day, making it easy to feel buried in messages (Gmail tips that help you save time and get more done). Important emails get lost in the clutter, and constant new message alerts can break your focus. How can you quickly locate that critical client email or separate urgent tasks from newsletters, without endless scrolling or missing something vital? This is where Gmail Labels come in. Gmail’s built-in Labels feature offers a powerful solution to tame your inbox chaos. Unlike traditional email folders, which can only put a message in one place, labels let you tag emails with multiple categories at once – adding flexibility that busy people need. In this article, we’ll explore how Gmail Labels work, why they’re different (and better) than folders, and how to use them to organize your Gmail inbox efficiently. By the end, you’ll have the know-how to manage your emails like a pro using Gmail’s labeling system.
Section 1: What are Gmail Labels and Why Do They Matter?
Gmail Labels are essentially tags or categories that you can apply to your email messages. In simple terms, labels are Google’s version of folders, but with added versatility ( Google Mail: Edit and Delete Labels | Cedarville University ). Just like a folder, a label can be used to group related emails together – for example, all messages related to a project or a client. However, the key difference is that you can apply more than one label to the same email. This many-to-many relationship means an email isn’t locked into a single folder; it can live under multiple labels simultaneously (Manage labels | Gmail - Google for Developers).
Think of labels like color-coded sticky notes you attach to your emails. You might tag one email with “Project X”, “Urgent”, and “Client ABC” labels all at once. This way, that email will show up when you look at any of those categories (How to Add Labels in Gmail to Categorize Your Emails). In a traditional folder system, you’d have to pick just one folder (or copy the email); in Gmail, one message can wear several hats. For example, a confirmation email about an upcoming business trip could be labeled “Travel Plans,” “Budget,” and “Important” – allowing it to appear in all three contexts without duplication (How to Add Labels in Gmail to Categorize Your Emails). Moving a message to a label in Gmail essentially works like a folder (it removes it from the Inbox view), but adding a label leaves it in your Inbox with an extra tag. In other words, applying labels is like adding multiple tags to an email, whereas moving an email to a label is like placing it in a folder (How to Add Labels in Gmail to Categorize Your Emails).
The advantage of Gmail’s labeling system is clear: it streamlines inbox management and boosts productivity. You can cross-categorize and find emails faster. Instead of frantically searching by keyword, you can simply click on a label to see all related messages. Labels also integrate with Gmail’s search – you can filter results by label – which makes digging up old info a breeze. By organizing with labels, you reduce clutter in your main inbox because you can archive messages (remove the Inbox label) without losing organization. Many Gmail productivity tips include labeling as a cornerstone technique because it keeps your inbox flexible and tailored to your workflow. In short, Gmail Labels matter because they give you a dynamic, customizable way to organize your Gmail inbox that traditional folders can’t match.
Section 2: How to Set Up and Use Gmail Labels (Step-by-Step Guide)
Now that we know what labels are and why they’re useful, let’s walk through how to use Gmail labels step by step. We’ll cover creating new labels, applying them to messages, editing/renaming labels, deleting labels, and organizing labels into nested hierarchies. These instructions apply to Gmail’s web interface, which offers the full labeling functionality.
Creating a New Label
Creating a label in Gmail takes just a few clicks. Here’s how to do it on the desktop web app:
Open Gmail and find the “Create new label” option: In Gmail’s left sidebar (where your Inbox and other categories are listed), scroll down and click “More” to expand the menu. Scroll through the expanded list and click “Create new label.” (How to Organize Your Gmail Inbox Using Labels (And Never Miss an Important Email Again!) - SPREADSHEETABLES BLOG) (Gmail Labels: How to Create and Organize Them In 2025) Screenshot: In the Gmail web interface, click More in the left sidebar, then select Create new label at the bottom of the labels list.
Name your label: Gmail will prompt you with a “New label” dialog box. Type in a clear, descriptive name for your label (for example, “Projects” or “Invoices Q4”). If you want to nest this label under an existing label (making it a sublabel), check the box for “Nest label under” and choose the parent label from the dropdown ( Google Mail: Edit and Delete Labels | Cedarville University ).
Create the label: Click the Create button in the dialog. That’s it – your new label will now appear in the sidebar label list. ( Google Mail: Edit and Delete Labels | Cedarville University ) (Gmail Labels: How to Create and Organize Them In 2025) Screenshot: The “New label” dialog in Gmail. You can enter a label name (e.g., “Reports”) and optionally nest it under a parent label before clicking Create to save.
Gmail will add the label to your “Labels” list (you may need to scroll or expand “More” to see it). By default, new labels are shown in the sidebar and on messages; you can adjust their visibility in settings if needed. Remember, Gmail allows up to 10,000 labels in your account (including sublabels) (Create labels to organize Gmail - Computer - Google Help) – far more than you’ll likely ever use, and a hint that you don’t need to worry about running out.
Applying Labels to Emails (Manual Labeling)
Once you have some labels, you can start tagging your emails with them. You can label a single email or multiple emails at once:
Labeling a single email: Open the email (or select it in the inbox), then click the label icon (the little tag symbol) at the top of Gmail. A drop-down menu will show all your labels. Check the box next to the label(s) you want to apply, then click Apply (How to Add Labels in Gmail to Categorize Your Emails). The label name(s) will now appear next to the email in your inbox list and at the top of the email when open. For example, you might open a newsletter email and tag it with your “Newsletters” label for later reading.
Labeling multiple emails at once: From the inbox view, check the boxes on the left of each email you want to label. Once you’ve selected the messages, click the label icon at the top. Then select the label(s) to apply and hit Apply. All selected conversations will get those labels (How to Add Labels in Gmail to Categorize Your Emails). This is handy for categorizing a batch of related emails (say, selecting four emails from HR and labeling them “HR” all at once).
Another quick method: you can drag and drop emails onto a label. Grab one or more selected emails and drag them onto a label name in the sidebar. This will apply that label and remove the “Inbox” label (i.e., archive the emails) in one action – effectively moving the emails into the label category. Dragging an email to a label is equivalent to applying the label and then archiving the message (Gmail Labels: Everything you need to know), so the email leaves your inbox view but remains under that label.
Editing or Renaming Labels
Made a typo or want to change a label name? Renaming (editing) labels is simple:
Find the label in your sidebar and hover your mouse over it. Click the three-dot menu icon (⁝) that appears to the right of the label name.
Click “Edit” from the menu ( Google Mail: Edit and Delete Labels | Cedarville University ). This opens an “Edit label” dialog.
Type the new label name in the field. If you want to convert this label into a sublabel, you can check “Nest label under” and pick a parent label here as well (or unnest a label by removing it from under a parent) ( Google Mail: Edit and Delete Labels | Cedarville University ).
Click Save. All emails that had the old label will now show the updated label name (you haven’t lost any emails; it’s just a rename).
This is useful if your projects or categories change names, or if you realize a different naming scheme would be clearer. For example, you might rename “Project Alpha” label to “Project Apollo” to reflect a new codename – all messages under that label will immediately reflect the change.
Deleting Labels
If a label becomes irrelevant, you can delete it (don’t worry, this won’t delete the emails inside it). To remove a label:
In the sidebar, hover over the label and click the three-dot menu icon on its right.
Choose “Remove label” from the menu ( Google Mail: Edit and Delete Labels | Cedarville University ). Gmail will ask you to confirm by clicking Delete – confirm, and the label will be removed.
When you delete a label, all emails that had that label simply lose the label. Those emails still exist in your account (findable via All Mail or search), but they won’t be categorized under that label anymore. For instance, if you delete a “Newsletters” label, the newsletters emails themselves remain in Gmail (perhaps in All Mail or other labels if they had any), only the tag “Newsletters” is gone.
Using Nested Labels (Label Hierarchies)
For more complex organization, Gmail allows nested labels – think of these like subfolders. You might have a top-level label for a broad category, and beneath it several specific sublabels. For example, a parent label “Projects” might contain sublabels “Project X”, “Project Y”, and “Project Z”. In Gmail’s label list, nested labels appear indented under their parent.
There are two ways to create a nested label:
Option 1: Create as nested from the start. When creating a new label (as in the creation steps above), click “Nest label under” and select an existing label as the parent. For example, create a label named “Client A” and nest it under a top-level label “Clients.” Gmail will place “Client A” under “Clients” in the list.
Option 2: Nest an existing label under another. If you already have a label you want to turn into a sublabel, use the Edit menu. Click the three-dot menu next to the label, choose Edit, then check “Nest label under” and select the parent label, then Save ( Google Mail: Edit and Delete Labels | Cedarville University ). The label will become nested under the chosen parent. (You can also reverse this by editing and unchecking the nest option to make a sublabel stand on its own.)
Organizing labels into hierarchies can be useful for grouping related categories. For instance, you might have Personal and Work as two top-level labels, and under Work have sublabels for each major project or department. Or, if you manage multiple clients, use each client as a parent label, with nested labels for different projects or years for that client. Nested labels are mainly for your visual organization; functionally, they behave like any other label (applying a sublabel to an email doesn’t automatically give it the parent label, so you may choose to apply both parent and child labels to certain emails for clarity). Use nesting sparingly for broad categories to avoid over-complicating your setup.
Section 3: Advanced Techniques and Best Practices for Gmail Labels
Once you’ve mastered the basics of creating and using labels, you can take your inbox organization to the next level. Here are some advanced Gmail productivity tips and best practices to help you make the most of labels:
Color-Code Your Labels Strategically: Gmail allows you to assign colors to each label, which adds a visual cue to your inbox. Using colors thoughtfully can help important messages stand out at a glance. For example, you might give a bright red color to a label like “Urgent” or “High Priority” so those emails catch your eye immediately, while using a calm green for a “Finance” or “Invoices” label (Gmail Labels: Everything you need to know). To color-code a label, click the three-dot menu next to the label name in the sidebar, select Label color, and choose a color (Gmail offers several preset colors or you can add a custom color). You’ll then see a colored square next to that label name, and any emails with that label will display the label name in that color. This way, an email marked with a red “Urgent” label will be highlighted in your inbox, alerting you to its importance. It’s a simple trick, but it makes scanning your inbox much faster.
Use Nested Labels for Complex Organization: As discussed, nested labels (sublabels) are great for grouping related topics. A best practice is to keep your top-level labels broad, and use sublabels for detail. For instance, you might have a label “Projects” with sublabels for each project, or a label “Clients” with a sublabel per client, and even sub-sublabels for each project under a client (two levels deep). For example: Clients → Client A → Contracts, Clients → Client A → Deliverables, Clients → Client B → Contracts, and so on. This hierarchy lets you collapse or expand sections of your label list as needed, and you can click the parent label to see all emails under all its sublabels. Just be cautious not to nest too deeply – a 2-3 level hierarchy is usually plenty. If you create a very deep nested structure, it might become cumbersome to navigate (and remember). The goal is to make emails easier to find, not buried under too many layers.
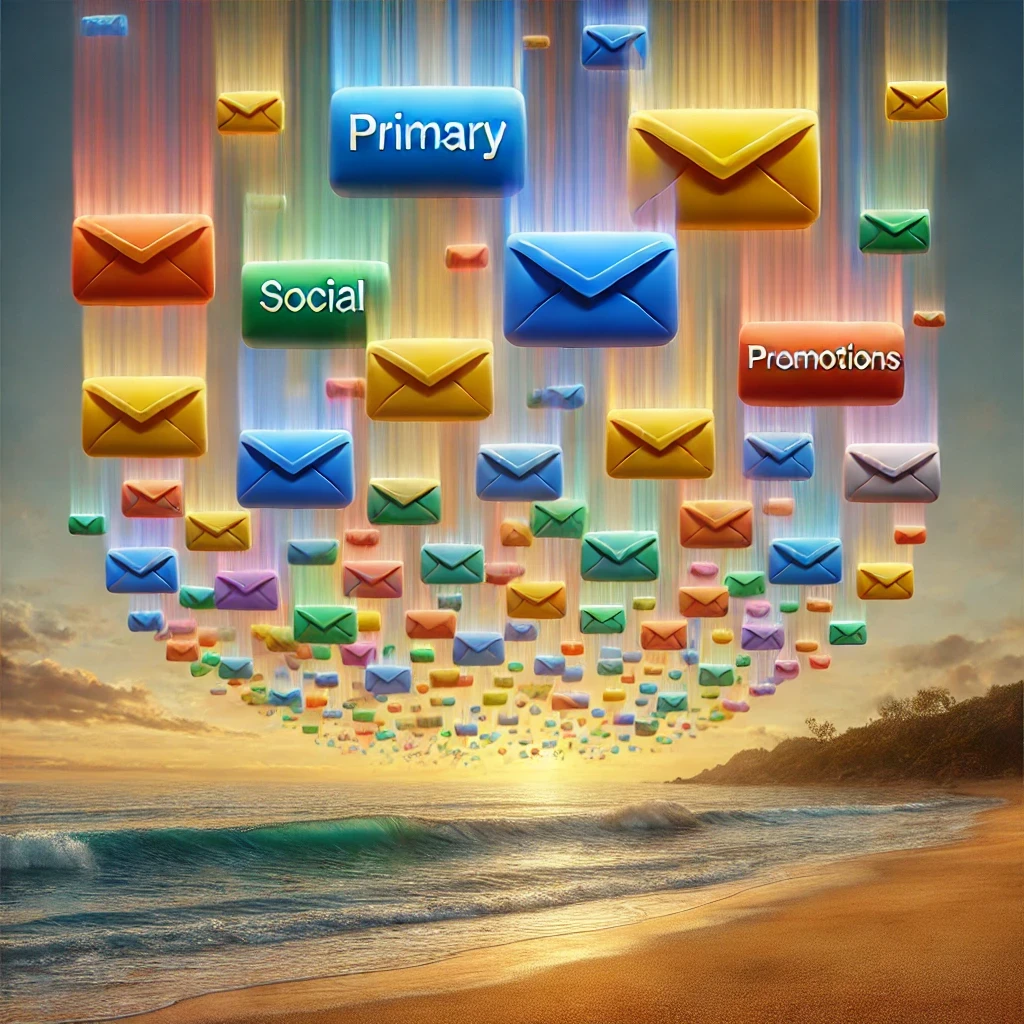
Create Niche Labels for Specific Email Types: Besides work projects, consider making labels for recurring categories of emails that clutter your inbox. For example, you could have labels like “Newsletters”, “Promotions”, “Receipts”, “Travel”, or “Action Required”. Use the Newsletters label for all your subscription emails and newsletters – you can even pair this with Gmail filters to automatically label and archive them (so they skip your inbox; more on automation in a moment). A Receipts label can collect order confirmations and payment receipts for easy access during expense reporting. An Action Required label might mark emails that need your follow-up or decision. These categories help compartmentalize your inbox so that, say, when you’re in the mood to read newsletters, you just click that label and all your newsletters are there waiting, instead of mixed into your main inbox.
Quickly Apply Labels with Keyboard Shortcuts: Power users of Gmail love its keyboard shortcuts. One extremely handy shortcut is the “l” key (that’s a lowercase L). With Gmail’s keyboard shortcuts enabled (check your Gmail settings under Advanced or General to make sure shortcuts are on), you can label emails without even touching the mouse. Simply select an email (use the arrow keys and the
xkey to select it, or open it), then press L on your keyboard. A small label menu will pop up right where you are, allowing you to type and select the label you want to apply (sitewow.blogg.se - Printout of gmail shortcuts). Hit Enter, and the label is applied. If you want to add another label to the same email, pressLagain and repeat. This can significantly speed up your email triage process – you could process a whole inbox, labeling messages, with just a few key taps. (Pro tip: Pressingvis another shortcut that moves an email to a label – effectively “moves to folder” – which is like applying a label and archiving in one go.)Combine Labels with Filters (Automation): While this article focuses on manual use of labels, be aware that Gmail Filters can automate a lot of labeling work for you. For example, you can set up a filter that automatically applies the “Newsletters” label to any incoming email that has “Unsubscribe” in it (a common trait of newsletter emails) and archive it out of your inbox. Or a filter for emails from a specific sender (like your boss) to apply a “Management” label and star it. This way you don’t have to label those emails by hand at all – Gmail does it for you as they arrive (How to Organize Your Gmail Inbox Using Labels (And Never Miss an Important Email Again!) - SPREADSHEETABLES BLOG). We’ll cover filters in detail in the next article, but keep in mind that anything you find yourself labeling repeatedly is a candidate for automation. It’s one of the best Gmail productivity tips: let filters handle the routine tagging so you only focus on the exceptions.
Section 4: Common Mistakes and Limitations When Using Gmail Labels
Gmail labels are extremely useful, but it’s possible to misuse them and diminish their effectiveness. Here are some common mistakes and limitations to watch out for:
Over-Labeling Your Emails: It’s tempting to create a label for every tiny category or to slap numerous labels on every message. But using too many labels can backfire and lead to confusion (How to Organize Your Gmail Inbox Using Labels (And Never Miss an Important Email Again!) - SPREADSHEETABLES BLOG). If you have dozens upon dozens of labels, your left sidebar becomes a jungle and it’s harder, not easier, to find what you need. A good rule of thumb is to stick to a reasonably small set of core labels (for example, 5–10 essential labels that cover your main categories) (How to Organize Your Gmail Inbox Using Labels (And Never Miss an Important Email Again!) - SPREADSHEETABLES BLOG). Avoid making a new label if an existing label will do the job. Likewise, don’t feel you must label absolutely everything – it’s okay to leave some less important emails unlabeled (you can always search for them). Each label you use should have a clear purpose. When everything is labeled, nothing stands out.
Overly Complex Nested Structures: While nested labels are useful, going too deep or creating an elaborate tree of labels can be counterproductive. If you nest labels within labels within labels, you might end up with an email taxonomy that’s hard to navigate and maintain. One user mistake is trying to mimic an entire file cabinet in Gmail labels with too many levels of hierarchy. This can make it slower to file and find messages (for example, having to remember that Client A → 2023 → Q4 → Invoices → Paid is the path for a certain email). Keep nesting to one or two levels for sanity’s sake. If you find yourself drilling down through many sublabels to get to an email, consider simplifying your structure. Don’t over-complicate your label system – as one expert advises, creating a label for every possible scenario will just lead to confusion (Efficiently Handling Customer Inquiries with Gmail Labels - Medium).
Relying Only on Manual Labeling: Gmail labels shine brightest when combined with automation. A common pitfall is to create labels but then apply them all by hand and not use filters. This can turn into a lot of extra work and inconsistency over time. If you’re spending too much time each day manually sorting emails into labels, you’re missing out on Gmail’s capabilities (How to Organize Your Gmail Inbox Using Labels (And Never Miss an Important Email Again!) - SPREADSHEETABLES BLOG). For example, if you have a “Receipts” label, it might make sense to have a filter auto-label new purchase confirmations as they come in. Without automation, there’s a risk you’ll forget or fall behind on labeling, and then your system loses its integrity. Use filters to shoulder the routine burden – it ensures important emails are labeled even if you’re away, and keeps your system consistent.
Not Maintaining Your Label System: Your needs can change over time, and an inbox organization system isn’t “set and forget.” One mistake is creating a set of labels and never revisiting them, even if they become obsolete or less useful. It’s a good idea to review your labels periodically (say, every few months). Merge or delete labels that you no longer need, and add new ones if a new category of email has become significant. For instance, if you switch roles or projects, you might retire old project labels and introduce new ones. Regular upkeep ensures your labels continue to reflect your priorities and that you don’t have old clutter in your label list (How to Organize Your Gmail Inbox Using Labels (And Never Miss an Important Email Again!) - SPREADSHEETABLES BLOG). A lean, up-to-date label list makes for a more productive inbox.
Limitations of Mobile Apps: Be aware that Gmail’s mobile apps have some limitations with labels. You can apply existing labels to emails on mobile, but as of now, you cannot create or edit labels from the Gmail app on some devices (Gmail Labels: How to Create and Organize Them In 2025) (on Android, the app doesn’t allow creating new labels or renaming them; on iOS, the “Create new” label option may exist in the menu, but features can vary). This means if you’re away from your computer and need a new label, you’ll have to wait or use the desktop site in a mobile browser. It’s a minor inconvenience, but important to note: major label management tasks (creating, nesting, deleting labels) are best done on the desktop web interface.
Despite these pitfalls, Gmail Labels remain a powerful tool. By avoiding over-labeling, keeping your system simple, and leveraging automation, you can overcome these limitations. Remember that labeling is meant to make your life easier – if it ever feels like labels are creating more work or confusion, take a step back and simplify your approach.
Conclusion and Summary:
Organizing your Gmail inbox with labels can be a game-changer for your productivity. By using Gmail Labels, you gain a flexible, multi-tag system to categorize emails in ways that make sense for you. Instead of a cluttered inbox where important messages hide among irrelevant ones, you’ll have an organized hub where everything is neatly labeled and easy to retrieve. We’ve seen how labels differ from traditional folders, allowing the same email to carry multiple labels for ultimate flexibility. We’ve walked through creating labels, tagging messages, and structuring labels into helpful hierarchies. With techniques like color-coding and keyboard shortcuts, you can further streamline your workflow and visually highlight what matters most. We also covered what not to do – such as overdoing it with too many labels – to ensure your system remains effective.
In practice, a well-labeled inbox means you spend less time searching and more time getting things done. Urgent emails grab your attention immediately, reference materials file away under project labels, and newsletters no longer clog your primary view. The result is an email setup that works for you, not against you, reducing stress and helping you stay on top of your communications.
Ready to take it even further? In the next article of this series, we’ll explore automating your inbox with Gmail Filters. You’ll learn how to have Gmail automatically sort incoming mail into the labels you’ve created, so your inbox practically manages itself. With labels and filters together, “inbox zero” (or close to it) might actually be achievable. Stay tuned for more Gmail productivity tips to supercharge your email management!